
Materials
-Your choice of fabric(the amount will vary depending
on the size of the dress you are making and you can
make this for any size girl/ woman)
-A t-shirt (fitted is the best) in a size relatively close to
the size you wear(or the person you are making this
for wears)
-Thread in a color coordinating with the shirt
Instructions

Step 1: Take the shirt and cut it around where would be an empire waist, for a little girl this is 1" to 2" below the armpits of the shirt.
Sorry I don't have a picture of the shirt before I cut it up, I was a bit eager to start this adorable dress! Save the bottom of the shirt! You will need it in about 10 seconds!
 Step 2: Cut the bottom part of the shirt at one of the side seams, and measure the width of it.
Then, take the width and multiply it by two. For example, the width of this shirt is 24". Multiply 24 by 2 and you get 48.

Step 3: To determine the length of the skirt of your dress, measure from the bottom of the bodice, to where you would like your dress to fall. Add three inches for seam allowance.
Step 4: Using the length you found in step 3 and the width you
found in step 2 as the dimensions, cut the skirt out of your
yardage.

Step 5: With right sides of your fabric together, sew it into a tube using a zigzag stitch.

Step 6: Hem one edge of your tube.
Step 7: Using long basting stitches, stitch a line, along the raw
edge of the tube. When you are done, do not backstitch, and
leave a long thread hanging off of the end of the seam.

Step 9: Pin, Pin, Pin!!! I did not take pictures of this, but I will try to explain what you need to do in great detail, since your success at doing this will make the dress beautiful! Do all of this right sides up(not inside out). As you are pinning the pieces together(the skirt on the inside and the bodice on the outside), you need to fold the edge of the bodice under a little bit, so that it looks like a finished edge. After you have accomplished this, stick the thin through the folded over edge, the skirt(right under the basting stitches) and back up through the shirt. Space the pins about an inch apart(yes, this is a lot of pins, but you will be in trouble otherwise :)).


The Wonderful finished product:
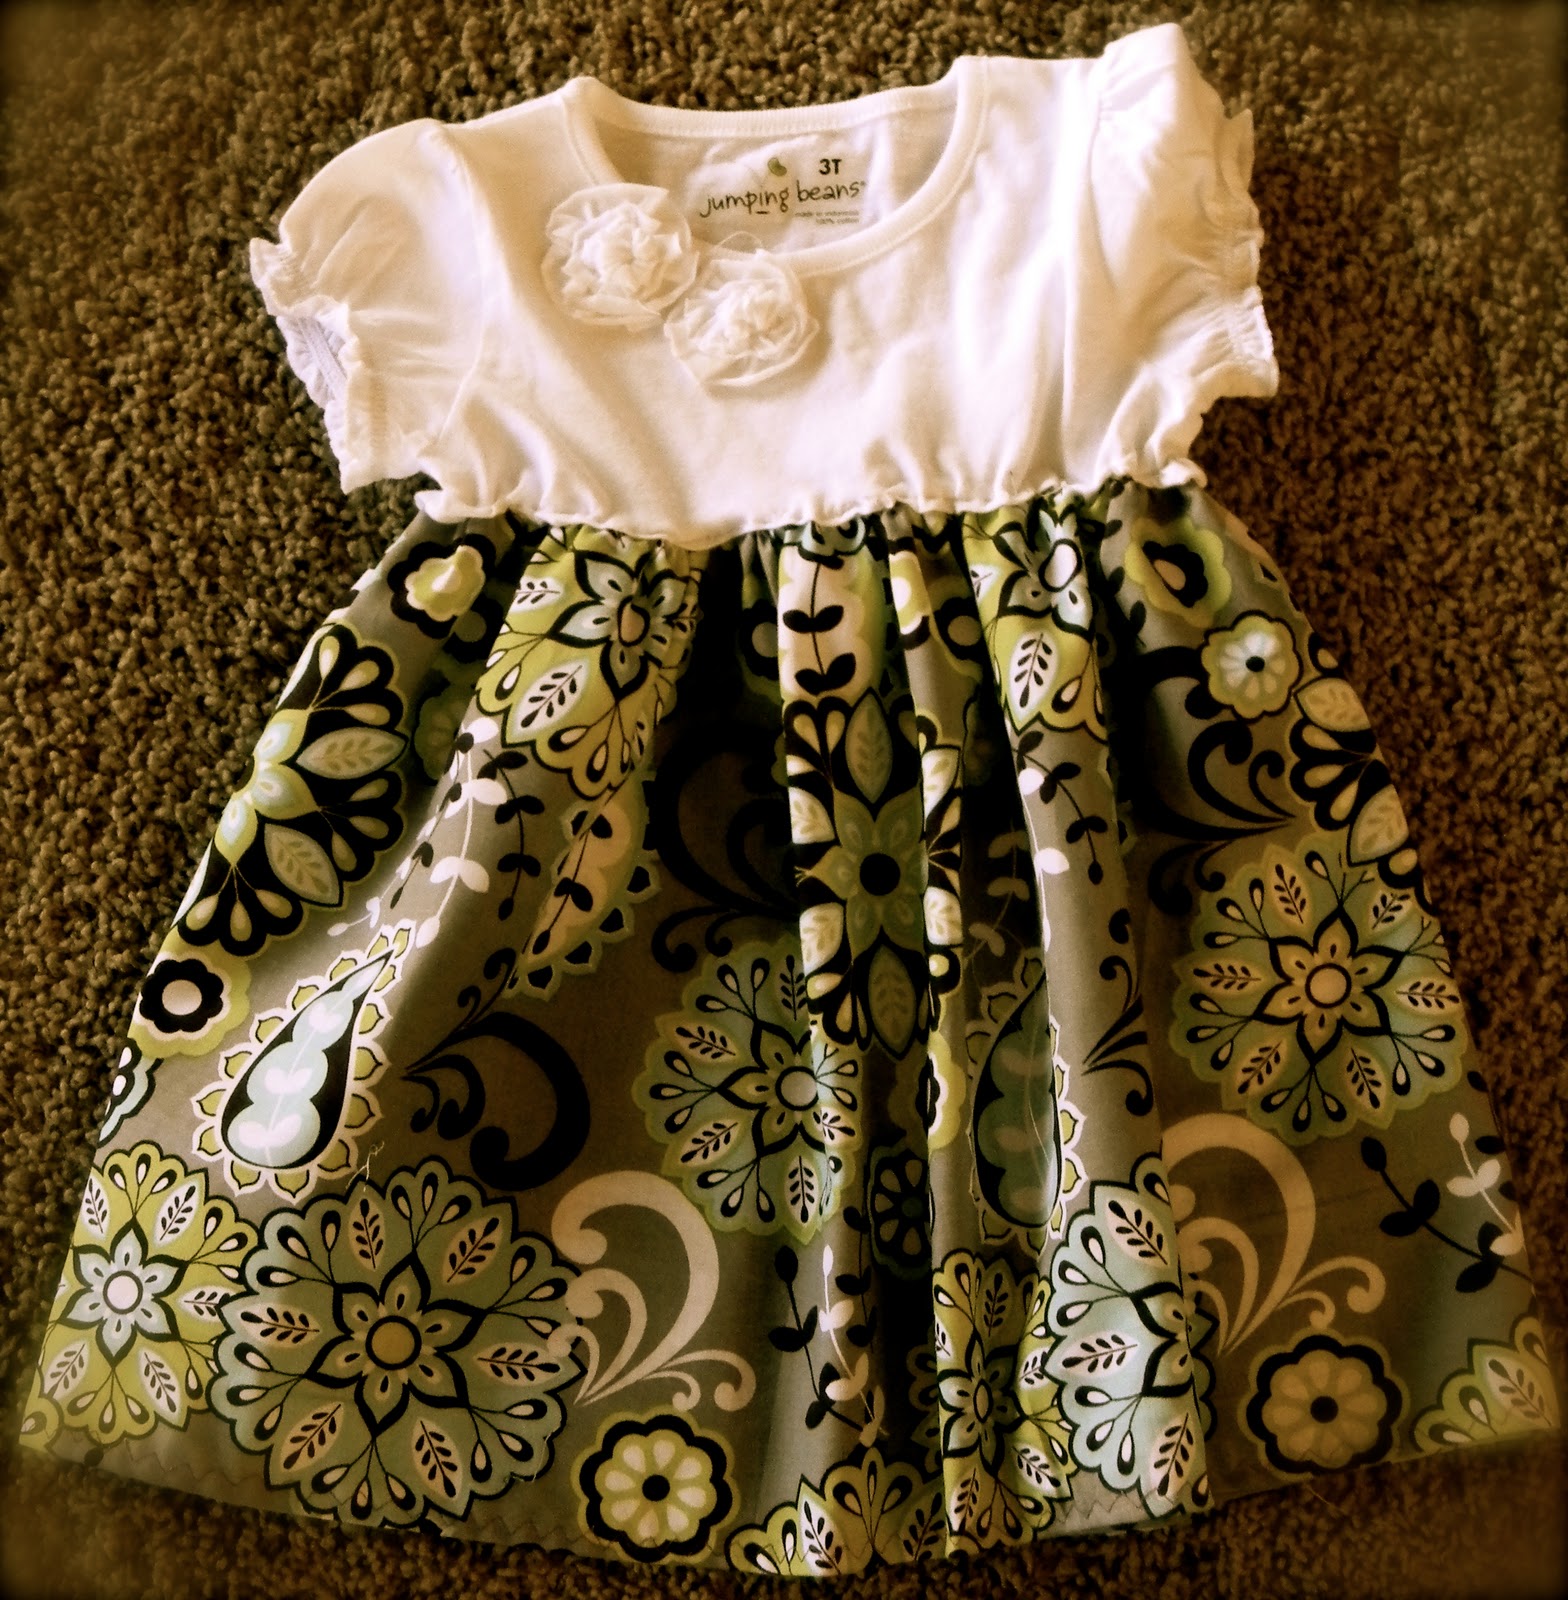 The Front
 The Back
Enjoy!
I would love to see finished products if anyone makes this!
~eliZabeth~
No comments:
Post a Comment
Note: Only a member of this blog may post a comment.